QuickBooks Online Link authorization code: Difference between revisions
Jump to navigation
Jump to search
(Created page with "From CommitCRM’s main menu select '''''Tools > Options...''''' center and then navigate to the QuickBooks tab. First Select the ''''...") |
No edit summary |
||
| (2 intermediate revisions by the same user not shown) | |||
| Line 1: | Line 1: | ||
From | From RangerMSP’s main menu select '''''Tools > Options...''''' | ||
[[File: | [[File:quickbooks_options_menu.png|center]] | ||
and then navigate to the QuickBooks tab. | and then navigate to the QuickBooks tab. | ||
First Select the '''''QuickBooks Online''''' option and then click the ''''' | First Select the '''''QuickBooks Online''''' option and then click the '''''Connect''''' button. | ||
[[File: | [[File:quickbooks_online_options.png|center]] | ||
Patiently wait until the QuickBooks Online Authorization window opens: | |||
[[File:QuickBooks_online_connect2.png|center]] | |||
[[File: | |||
Use your existing QuickBooks Online credentials to log into your QuickBooks Online Account. | Use your existing QuickBooks Online credentials to log into your QuickBooks Online Account. | ||
| Line 36: | Line 21: | ||
Once you are signed in, the following page be displayed: | Once you are signed in, the following page be displayed: | ||
[[File: | [[File:Quickbooks_online_wizard_authorize.png|center]] | ||
Click '''''Connect''''' button to allow RangerMSP to access your QuickBooks Online account. | |||
The name of the QuickBooks Online company should now be displayed: | The name of the QuickBooks Online company should now be displayed: | ||
[[File: | [[File:Quickbooks_online_wizard_finish.png|center]] | ||
<br> | <br> | ||
Click '''''OK''''' to close this window. | Click '''''OK''''' to close this window. | ||
Congratulations! The connection between | Congratulations! The connection between RangerMSP and your QuickBooks Online has been successfully established!<br> | ||
Go back to the main[[QuickBooks_Link#QuickBooks_Online| | Go back to the main[[QuickBooks_Link#QuickBooks_Online| RangerMSP-QuickBooks Link setup guide]]. | ||
Latest revision as of 13:36, 8 July 2020
From RangerMSP’s main menu select Tools > Options...
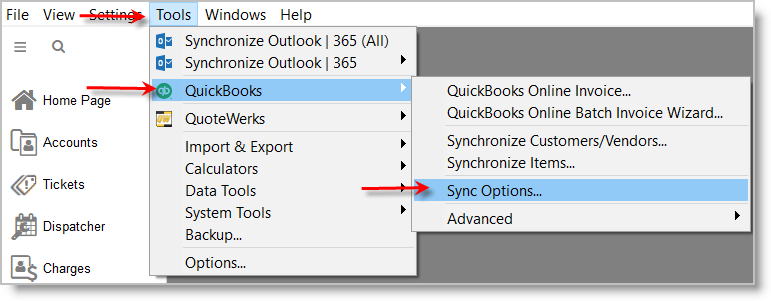
and then navigate to the QuickBooks tab.
First Select the QuickBooks Online option and then click the Connect button.
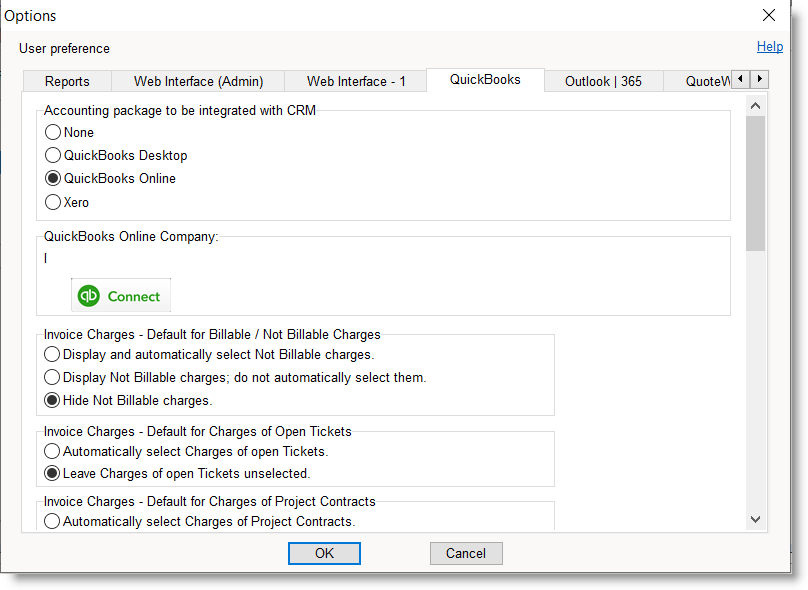
Patiently wait until the QuickBooks Online Authorization window opens:
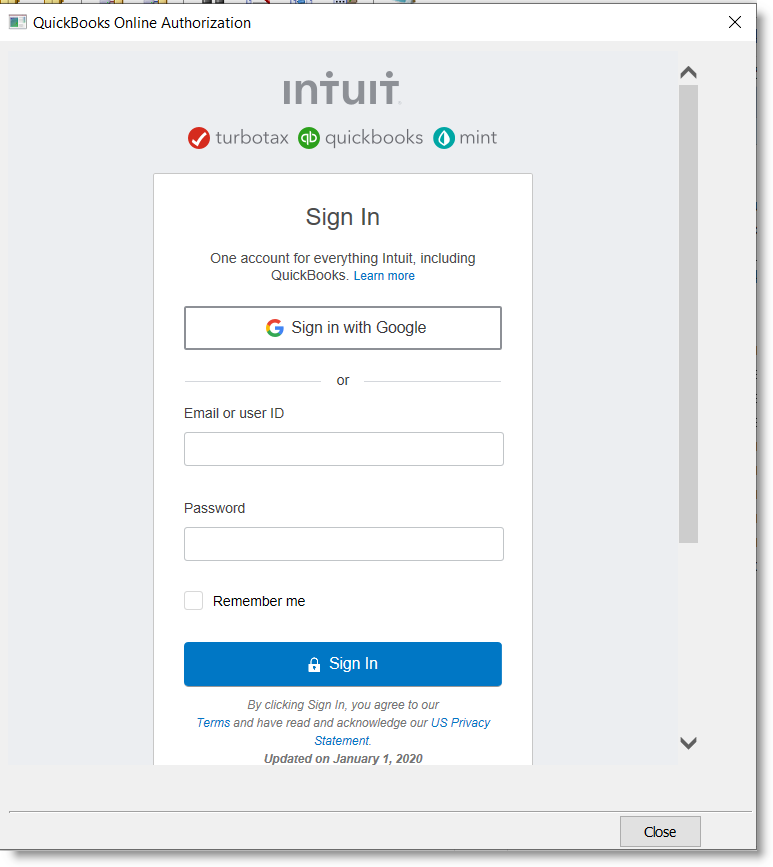
Use your existing QuickBooks Online credentials to log into your QuickBooks Online Account.
Once you are signed in, the following page be displayed:
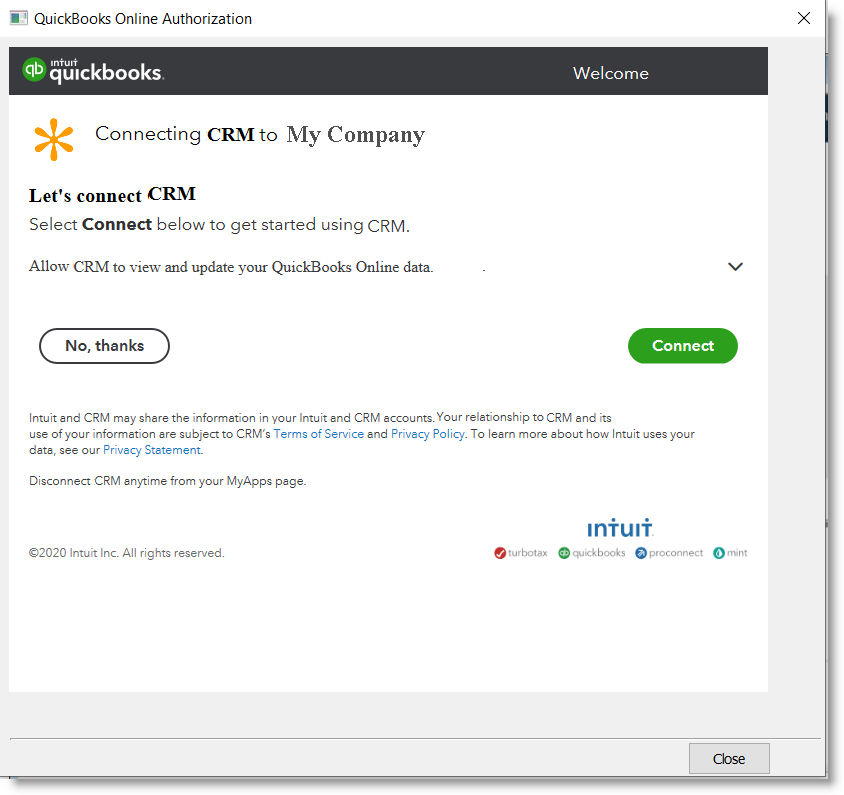
Click Connect button to allow RangerMSP to access your QuickBooks Online account.
The name of the QuickBooks Online company should now be displayed:
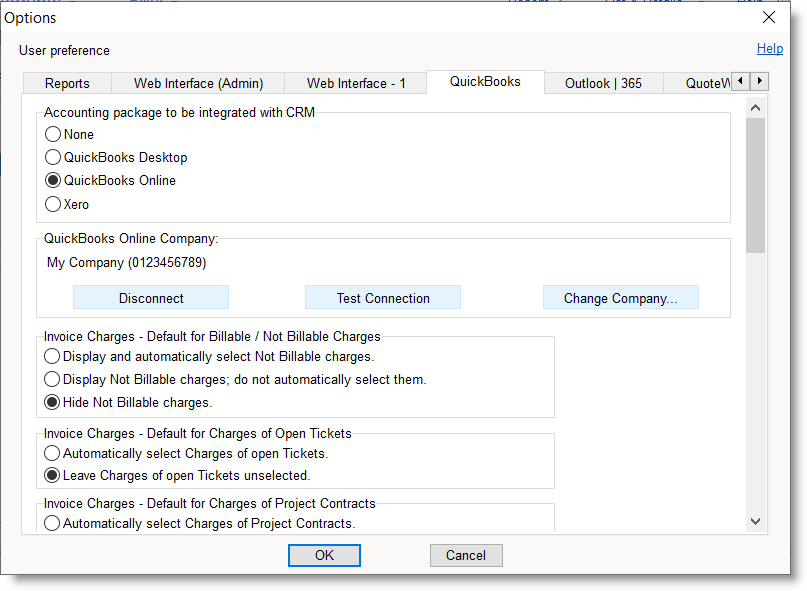
Click OK to close this window.
Congratulations! The connection between RangerMSP and your QuickBooks Online has been successfully established!
Go back to the main RangerMSP-QuickBooks Link setup guide.