QuickBooks Desktop Link Installation Instructions: Difference between revisions
No edit summary |
No edit summary |
||
| (3 intermediate revisions by the same user not shown) | |||
| Line 1: | Line 1: | ||
The | The RangerMSP-QuickBooks Link setup uses a step-by-step wizard. In the installation instructions below, only the main steps of the installation process are covered. | ||
The | The RangerMSP-QuickBooks Link needs to be set up once, after the initial setup you simply use the various options available to you from the QuickBooks menus. | ||
Depending on your current system installation you may be asked to download an Intuit setup file. If you are asked to download the Intuit file, follow the download instructions that will be displayed. | Depending on your current system installation you may be asked to download an Intuit setup file. If you are asked to download the Intuit file, follow the download instructions that will be displayed. | ||
| Line 9: | Line 9: | ||
<br> | <br> | ||
====Requirements==== | ====Requirements==== | ||
*'''Using the | *'''Using the RangerMSP QuickBooks Link requires a Quickbooks client to already be installed on the PC that you want to generate invoices and sync data from.''' | ||
This can be set up on a single computer responsible for creating invoices for all the charges in the system. Alternatively, you can have the client installed on any PC that needs to use the link. Once the QuickBooks client is installed and connected to the QuickBooks Company File, you can continue with the | This can be set up on a single computer responsible for creating invoices for all the charges in the system. Alternatively, you can have the client installed on any PC that needs to use the link. Once the QuickBooks client is installed and connected to the QuickBooks Company File, you can continue with the RangerMSP QuickBooks Link Installation steps. | ||
<br> | <br> | ||
====Installing the | ====Installing the RangerMSP-QuickBooks Link==== | ||
From the Main menu, select Tools > Options... <br> | From the Main menu, select Tools > Options... <br> | ||
| Line 24: | Line 24: | ||
Select the country your edition of QuickBooks belongs to, and click ''Connect'' button. | Select the country your edition of QuickBooks belongs to, and click ''Connect'' button. | ||
To integrate with QuickBooks, | To integrate with QuickBooks, RangerMSP uses the latest direct API technologies offered by Intuit/QuickBooks, known as QBFC. QBFC should be installed on every PC on your network which will be using the RangerMSP-QuickBooks Link. | ||
If QBFC is not installed on your PC, you will be asked to install it. | If QBFC is not installed on your PC, you will be asked to install it. | ||
[[File: | [[File:install_qbfc_question.png|center]] | ||
Click 'Yes'. QBFC must be installed in order to use | Click 'Yes'. QBFC must be installed in order to use RangerMSP-QuickBooks Link. | ||
If you do not have the QBFC installation file, you may download it from the | If you do not have the QBFC installation file, you may download it from the RangerMSP web site. Instructions for downloading the file from the RangerMSP site will appear. Follow these instructions, and then continue with the setup process. To view QBFC installation instructions including all the steps, go to the [[QuickBooks_Desktop_Link_Installation_Instructions#QBFC_Installation_Instructions_for_RangerMSP-QuickBooks_Link|QBFC Installation Instructions for RangerMSP-QuickBooks Link]] section. | ||
The entire synchronization process takes place between | The entire synchronization process takes place between RangerMSP and a QuickBooks company file which you select. | ||
<div id="wizard"></div>Continue with the wizard until you are asked to select the QuickBooks company file you wish to synchronize with | <div id="wizard"></div>Continue with the wizard until you are asked to select the QuickBooks company file you wish to synchronize with RangerMSP. | ||
[[File: | [[File:quickbooks_wizard_step4.png|center]] | ||
Click on 'Click to Select' button to select your QuickBooks company file. | Click on 'Click to Select' button to select your QuickBooks company file. | ||
| Line 48: | Line 48: | ||
After selecting the company file continue with the setup process. | After selecting the company file continue with the setup process. | ||
In the following screen, you will be asked to run QuickBooks and open the selected QuickBooks company file as a QuickBooks Administrator user and in Single User mode. Follow these instructions carefully to ensure a smooth installation of the | In the following screen, you will be asked to run QuickBooks and open the selected QuickBooks company file as a QuickBooks Administrator user and in Single User mode. Follow these instructions carefully to ensure a smooth installation of the RangerMSP-QuickBooks Link. | ||
[[File: | [[File:quickbooks_wizard_step5.png|center]] | ||
| Line 61: | Line 61: | ||
<u>Note:</u> The dialog box you see may slightly differ from the one above depending on your version/edition of QuickBooks. | <u>Note:</u> The dialog box you see may slightly differ from the one above depending on your version/edition of QuickBooks. | ||
Click Continue. QuickBooks will then ask you to confirm that you grant the permissions to | Click Continue. QuickBooks will then ask you to confirm that you grant the permissions to RangerMSP. Click Yes. | ||
The following confirmation dialog box may be displayed. | The following confirmation dialog box may be displayed. | ||
| Line 71: | Line 71: | ||
Finally, the Access Confirmation window is displayed. | Finally, the Access Confirmation window is displayed. | ||
This is the last confirmation needed to allow | This is the last confirmation needed to allow RangerMSP to access your firm's QuickBooks data file. | ||
[[File:quickbooks_confirm_permissions2.gif|center]] | [[File:quickbooks_confirm_permissions2.gif|center]] | ||
| Line 84: | Line 84: | ||
[[File: | [[File:quickbooks_options_tab2.png|center]] | ||
You will be returned to the Options window. Confirm by clicking OK. | You will be returned to the Options window. Confirm by clicking OK. | ||
Done! The | Done! The RangerMSP-QuickBooks Link setup is now complete.<br> | ||
Go back to the main [[QuickBooks_Link#QuickBooks_Desktop| | Go back to the main [[QuickBooks_Link#QuickBooks_Desktop|RangerMSP-QuickBooks Link setup guide]]. | ||
<br> | <br> | ||
| Line 98: | Line 98: | ||
===QBFC Installation Instructions for | ===QBFC Installation Instructions for RangerMSP-QuickBooks Link=== | ||
Follow the detailed instructions below to set up QBFC for | Follow the detailed instructions below to set up QBFC for RangerMSP-QuickBooks Link. This procedure is only required once. | ||
To integrate with QuickBooks, | To integrate with QuickBooks, RangerMSP uses the latest direct API technologies offered by Intuit/QuickBooks, known as QBFC. QBFC should be installed on every PC on your network which will be using the RangerMSP-QuickBooks Link. | ||
You may be asked to install QBFC. | You may be asked to install QBFC. | ||
[[File: | [[File:install_qbfc_question.png|center]] | ||
QBFC must be installed in order to use | QBFC must be installed in order to use RangerMSP-QuickBooks Link. Click Yes to install QBFC. | ||
If you do not have the QBFC installation file, you may download it from the [http:// | If you do not have the QBFC installation file, you may download it from the [http://{{SERVERNAME}}/quickbooks_downloads/ RangerMSP web site]. Instructions for downloading the file from the RangerMSP site will appear. Follow these instructions, and then continue with the setup process. | ||
The entire synchronization process takes place between | The entire synchronization process takes place between RangerMSP and a QuickBooks company file which you select.<br>Continue following the wizard until you are asked to select the QuickBooks company file you wish RangerMSP to sync with. | ||
If a window pops up with a security message about the QBFC7_0Installer.exe file, allow all security warnings, and run the file. | If a window pops up with a security message about the QBFC7_0Installer.exe file, allow all security warnings, and run the file. | ||
| Line 130: | Line 130: | ||
Go back to the main [[QuickBooks_Link#QuickBooks_Desktop| | Go back to the main [[QuickBooks_Link#QuickBooks_Desktop|RangerMSP-QuickBooks Link setup guide]]. | ||
[[Category:User Manuals]] | [[Category:User Manuals]] | ||
[[Category:QuickBooks]] | [[Category:QuickBooks]] | ||
Latest revision as of 13:21, 8 July 2020
The RangerMSP-QuickBooks Link setup uses a step-by-step wizard. In the installation instructions below, only the main steps of the installation process are covered.
The RangerMSP-QuickBooks Link needs to be set up once, after the initial setup you simply use the various options available to you from the QuickBooks menus.
Depending on your current system installation you may be asked to download an Intuit setup file. If you are asked to download the Intuit file, follow the download instructions that will be displayed.
Before running the setup make sure QuickBooks is installed on your computer, it is working properly and includes the latest patches and updates, and that you are logged in as a Windows Administrator.
Requirements
- Using the RangerMSP QuickBooks Link requires a Quickbooks client to already be installed on the PC that you want to generate invoices and sync data from.
This can be set up on a single computer responsible for creating invoices for all the charges in the system. Alternatively, you can have the client installed on any PC that needs to use the link. Once the QuickBooks client is installed and connected to the QuickBooks Company File, you can continue with the RangerMSP QuickBooks Link Installation steps.
Installing the RangerMSP-QuickBooks Link
From the Main menu, select Tools > Options...
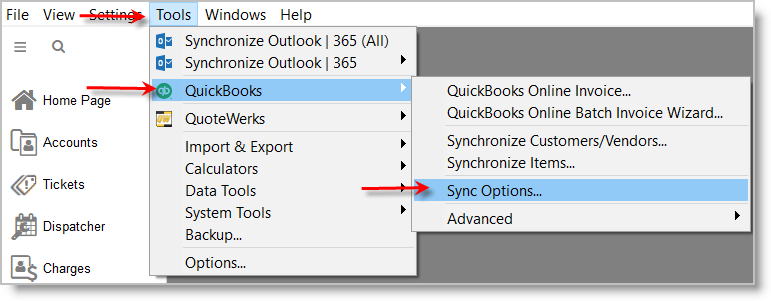
and then navigate to the QuickBooks tab.
The Options dialog box appears.
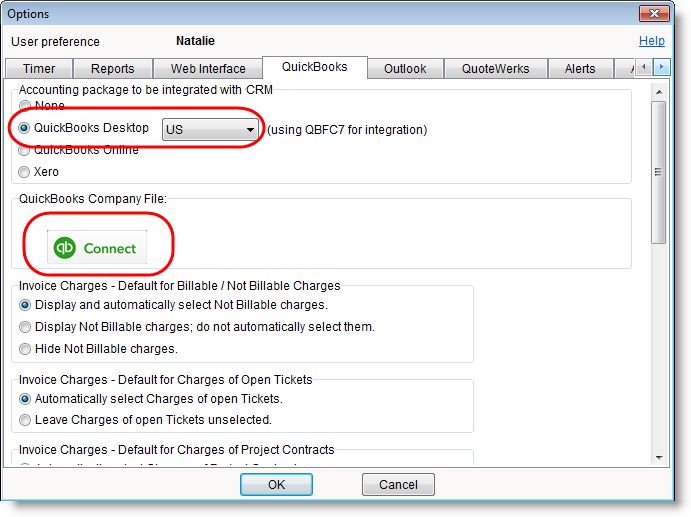
Select the country your edition of QuickBooks belongs to, and click Connect button.
To integrate with QuickBooks, RangerMSP uses the latest direct API technologies offered by Intuit/QuickBooks, known as QBFC. QBFC should be installed on every PC on your network which will be using the RangerMSP-QuickBooks Link.
If QBFC is not installed on your PC, you will be asked to install it.

Click 'Yes'. QBFC must be installed in order to use RangerMSP-QuickBooks Link.
If you do not have the QBFC installation file, you may download it from the RangerMSP web site. Instructions for downloading the file from the RangerMSP site will appear. Follow these instructions, and then continue with the setup process. To view QBFC installation instructions including all the steps, go to the QBFC Installation Instructions for RangerMSP-QuickBooks Link section.
The entire synchronization process takes place between RangerMSP and a QuickBooks company file which you select.
Continue with the wizard until you are asked to select the QuickBooks company file you wish to synchronize with RangerMSP.
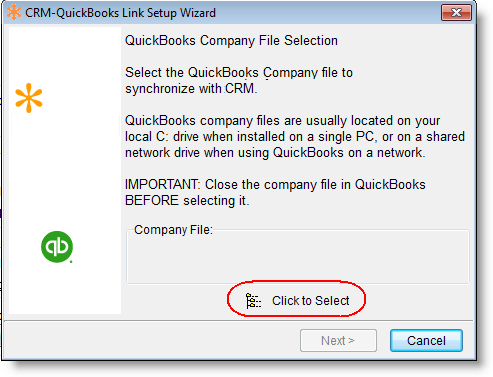
Click on 'Click to Select' button to select your QuickBooks company file.
Select the company file and click Open.
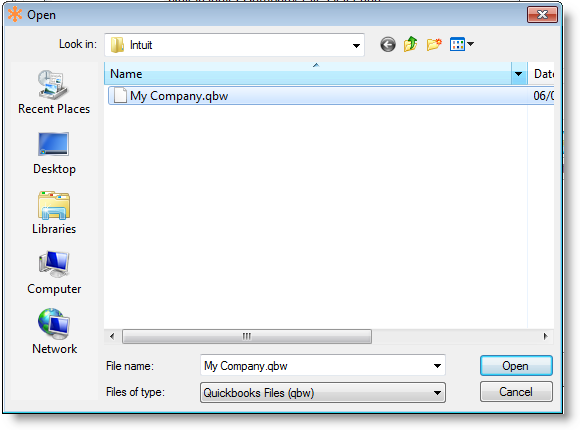
After selecting the company file continue with the setup process.
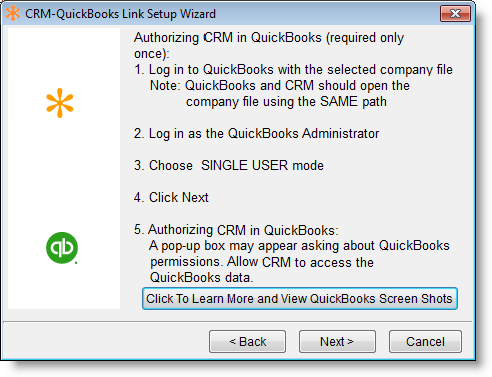
In the following screen, you will be asked to run QuickBooks and open the selected QuickBooks company file as a QuickBooks Administrator user and in Single User mode. Follow these instructions carefully to ensure a smooth installation of the RangerMSP-QuickBooks Link.
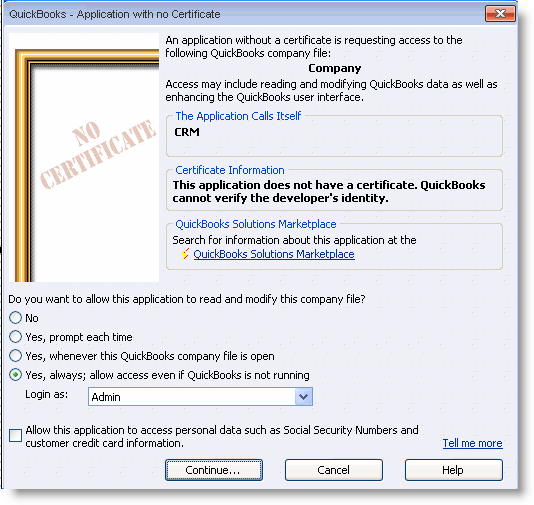
Make sure you select the following settings as illustrated above:
- Always allow access even if QuickBooks is not running
- Login as user with Admin privileges.
Note: The dialog box you see may slightly differ from the one above depending on your version/edition of QuickBooks.
Click Continue. QuickBooks will then ask you to confirm that you grant the permissions to RangerMSP. Click Yes.
The following confirmation dialog box may be displayed.
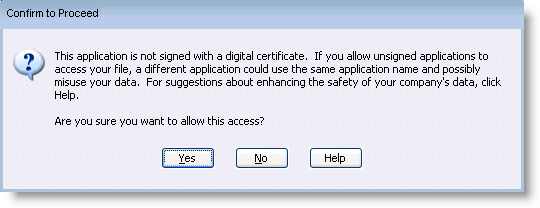
Click Yes to grant access.
Finally, the Access Confirmation window is displayed.
This is the last confirmation needed to allow RangerMSP to access your firm's QuickBooks data file.
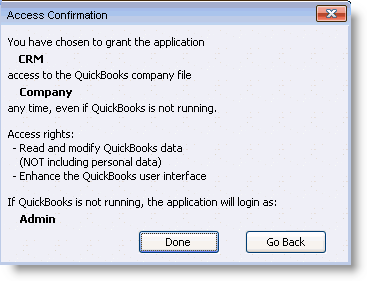
Click Done.
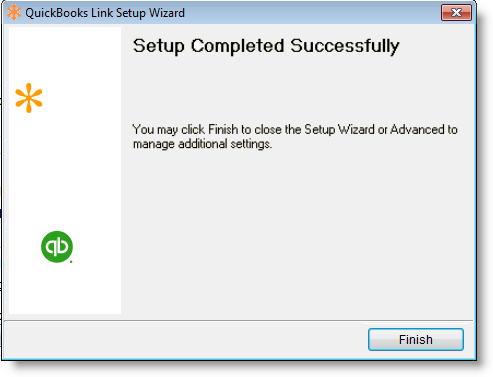
Click Finish.
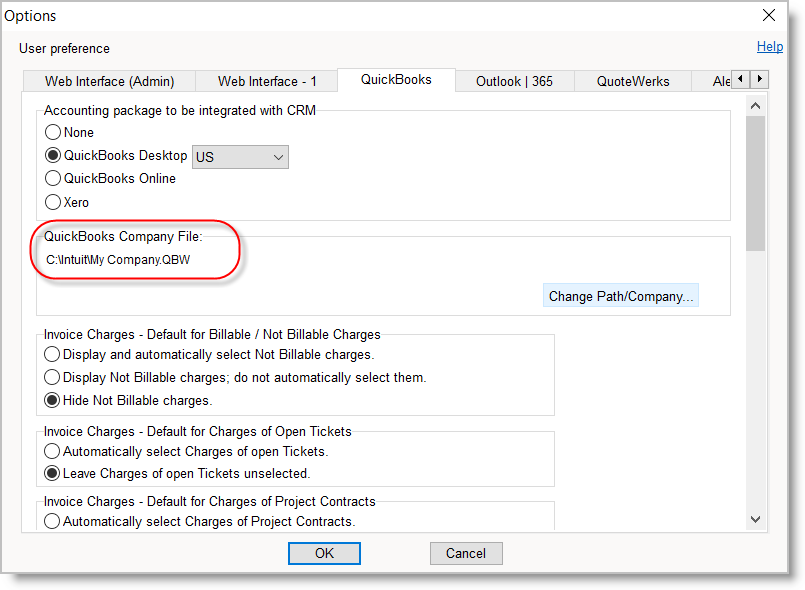
You will be returned to the Options window. Confirm by clicking OK.
Done! The RangerMSP-QuickBooks Link setup is now complete.
Go back to the main RangerMSP-QuickBooks Link setup guide.
QBFC Installation Instructions for RangerMSP-QuickBooks Link
Follow the detailed instructions below to set up QBFC for RangerMSP-QuickBooks Link. This procedure is only required once.
To integrate with QuickBooks, RangerMSP uses the latest direct API technologies offered by Intuit/QuickBooks, known as QBFC. QBFC should be installed on every PC on your network which will be using the RangerMSP-QuickBooks Link.
You may be asked to install QBFC.

QBFC must be installed in order to use RangerMSP-QuickBooks Link. Click Yes to install QBFC.
If you do not have the QBFC installation file, you may download it from the RangerMSP web site. Instructions for downloading the file from the RangerMSP site will appear. Follow these instructions, and then continue with the setup process.
The entire synchronization process takes place between RangerMSP and a QuickBooks company file which you select.
Continue following the wizard until you are asked to select the QuickBooks company file you wish RangerMSP to sync with.
If a window pops up with a security message about the QBFC7_0Installer.exe file, allow all security warnings, and run the file.
The QBFC installation will begin:
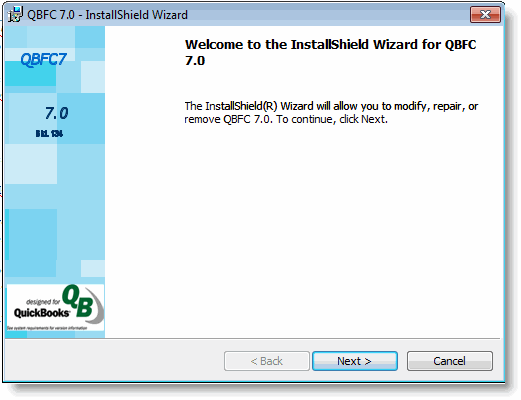
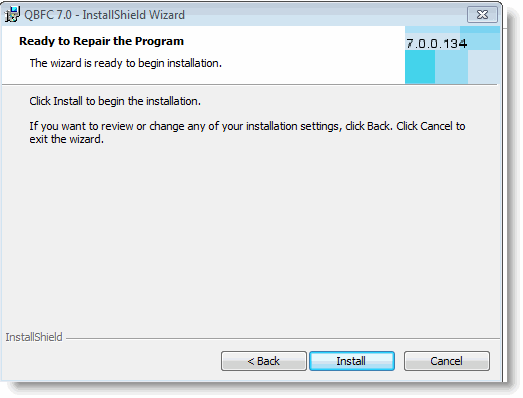
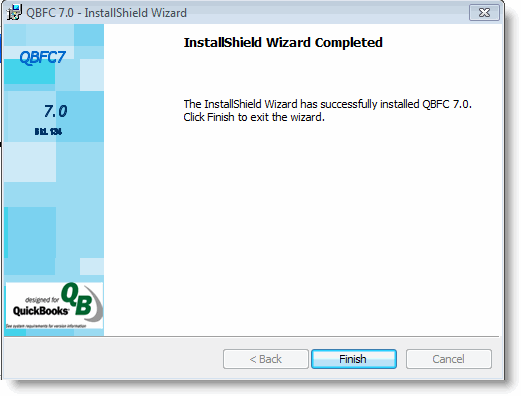
Click Finish. The QBFC installation is complete.
Go back to the main RangerMSP-QuickBooks Link setup guide.